
Table of Contents
Hello Friends,
1. First things first, Why Service Pack 1 needed to be installed
In some cases of installation of any software demands Service Pack 1 for Windows 7 must be installed before installing required software. Without Service Pack 1 the required application cannot run. Hence this is the right article where you can easily download and install the Service Pack 1 for Windows 7 and run your desired application.

2. What about Windows Update in Windows 7
As you may know Microsoft is not delivering updates for Windows 7 due to its End-Of-Life (EOL) after 14 January 2020. And now a days Windows 7 is just an outdated operating system. But still in some cases users are using Windows 7 system due to their computer hardware configuration issues or any software or device driver compatibility issues.
And I’m socked when users are doing the wrong way to updating their system on Service Pack 1 level by editing their Windows Registry value. Which is not the right way to do this. Because Service Pack 1 is not just a name or title of Windows 7, it is a process of updating the entire Windows system that you have to update your system with the help of Windows Update or download the update manually from Microsoft site itself.
And friends I already told you Windows 7 is EOL Operating System now a days and you can’t update your Windows 7 System through Windows Update mechanism. If you need any update or patches for your Windows 7 PC like Service Pack 1 which is just a bundle of patches or group of patches, which you need to download it manually and install. Patches also known as KB (Knowledge Base). Meaning that when you download any update or patches its start from KB and their respective numbers given by Microsoft.
3. Download and install Service Pack 1 for Windows 7
So, in this below step I’m going to tell you how you can manually download the Service Pack 1 or any other patches for Windows 7 from Microsoft site itself.
Step -1 : Type in Google and search Microsoft Update Catalog and hit Enter key. Also given the Download button at the end of this post.
Step – 2 : Click on Windows 7 Service Pack 1 link. Also given the Download button at the end of this post.

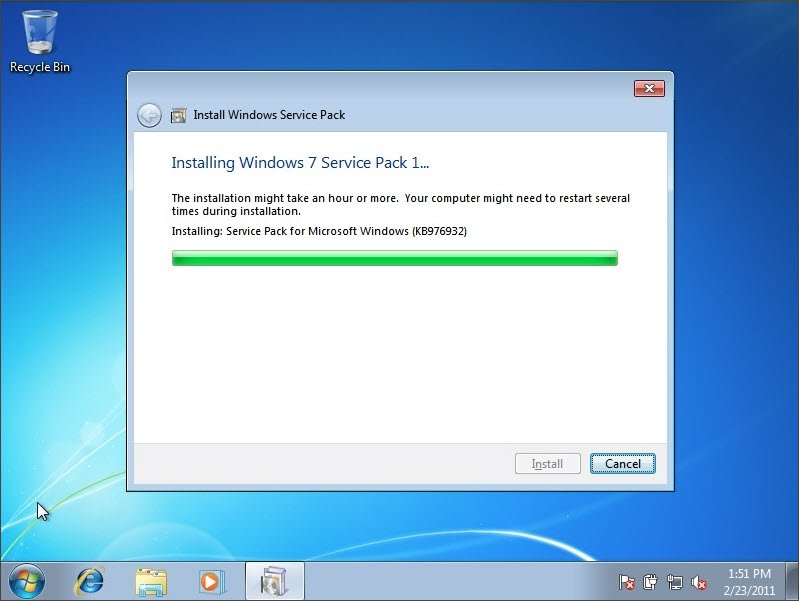
Step – 3 : For 32 bit Windows 7 just download the 541 MB in size KB named as Windows 7 Service Pack 1 (KB976932) and for 64 bit Windows 7 download 912 MB in size KB named as Windows 7 Service Pack 1 for x64-based Systems (KB976932)

Step – 4 : New pop-up window will open, now click on the .exe link and it will start downloading the file otherwise if its not started in some case just right click on exe file and click Copy link address

Step – 5 : Now Paste it in the new tab of your browser and hit Enter key, it will start downloading the Windows 7 Service Pack 1 file

Step – 6 : Once the download is complete you are ready to install Service Pack 1 on your Windows 7 PC. Also make sure before installing Service Pack 1 that you have minimum 5 GB of disk space is free in your C drive


Step – 7 : Now time to check in the System Properties once the system comes up after installing and reboot by pressing Shift + Pause Break key or Right click on This PC and go to Properties

Here is the video for you guys on our Computics Lab YouTube channel that you can refer and solve it at your own pace. Must like, share and subscribe our Computics Lab YouTube channel which motivate us to create more awesome helping tech videos for you. Thanks for reading and if you have any feedback, don’t forget to comment us on our YouTube video or to this blog post. We will happy to help you!!!
2 thoughts on “How to install Service Pack 1 for Windows 7”