
Hello Friends,
In this article, we’ll discuss Memory Integrity, a feature introduced by Microsoft in Windows 10 and 11 operating systems. If you’re a Windows 10 or 11 user, it’s important to be aware of Windows Security Defender and the various security settings it provides. One such setting is Memory Integrity, which is crucial for device security. Keep reading to find out more about this feature and how it can help protect your device.
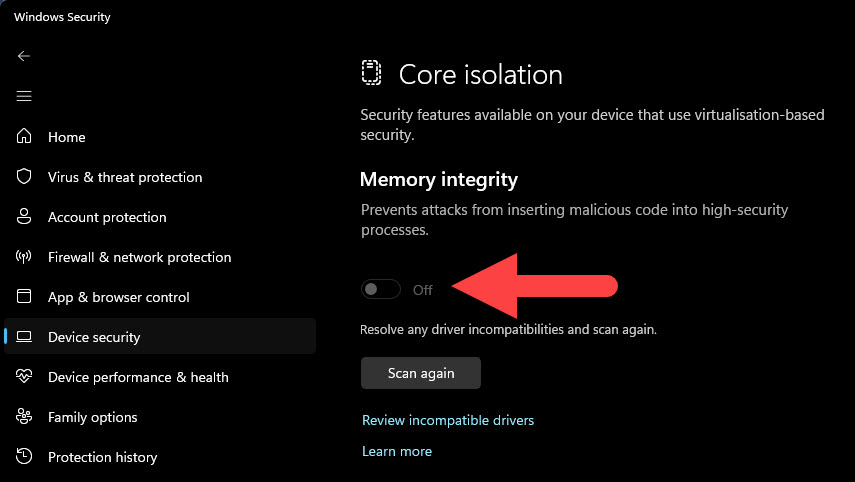
Table of Contents
What is Memory integrity all about in Windows Security Defender?
Memory Integrity is a security feature in Windows Security that helps protect your device from various types of attacks. It works by preventing malicious code from accessing high-security processes and memory regions on your device. This is achieved by enabling a feature called Core isolation, which isolates critical system processes and memory from other non-critical processes.
When Memory Integrity is enabled, it prevents certain types of malware and exploits from running on your device, such as kernel-mode drivers that are not signed by Microsoft. This feature is especially important for users who handle sensitive data or work with critical applications, as it provides an added layer of protection against cyber threats.
Overall, Memory Integrity is a powerful security feature that helps keep your device safe from a variety of threats. If you’re a Windows 10 or 11 user, it’s highly recommended that you enable this feature through Windows Security Defender.
Memory Integrity is not getting On
If you’re experiencing issues with Memory Integrity not turning On and it keeps turning off, then the main reason could be an incompatible driver installed on your system. In such a case, the best solution is to uninstall the incompatible driver from your Windows 10 or Windows 11 operating system. Once you remove the incompatible driver, you should be able to keep Memory Integrity turned on without any issues after restart the system. You can also try running the Windows Memory Diagnostic tool to check for any issues with your system’s memory.
How to uninstall the incompatible driver from Windows ?
First : Find out the incompatible drivers
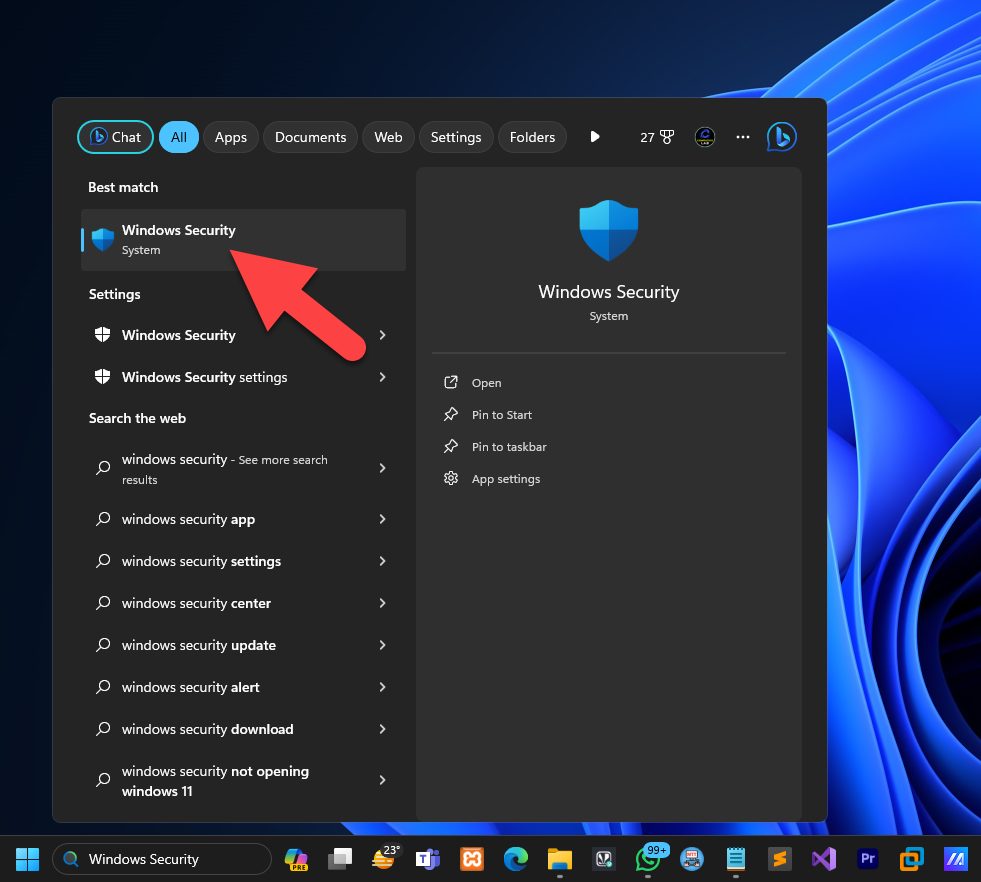
Go to Search and type Windows Security Defender and click to Open
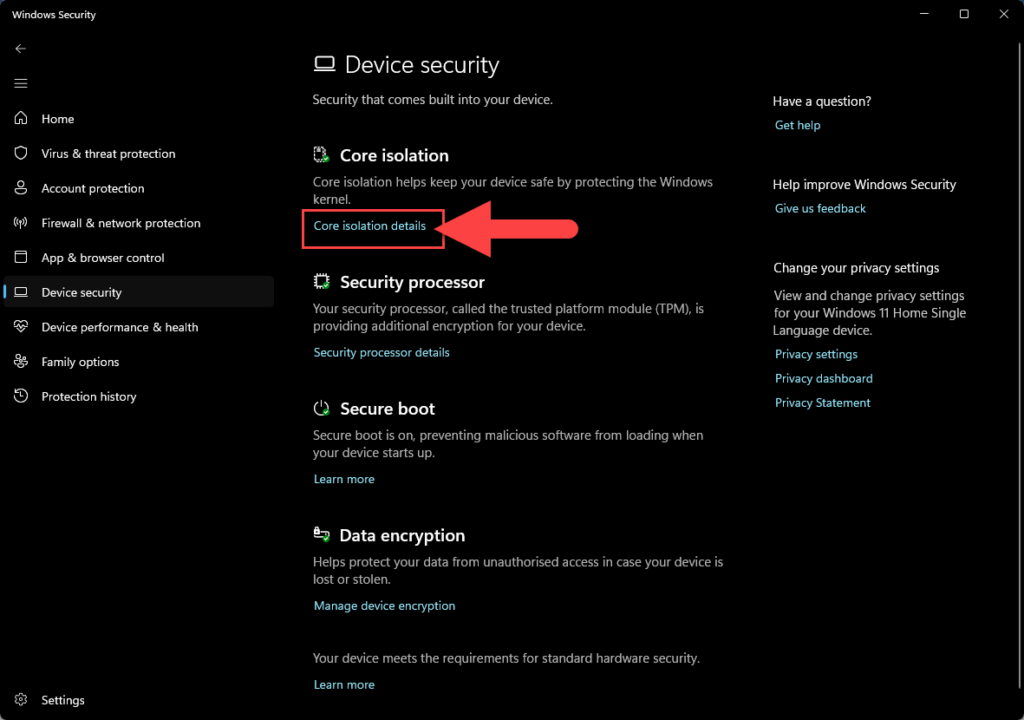
Go to Device Security and click on Core isolation details in Core Isolation section
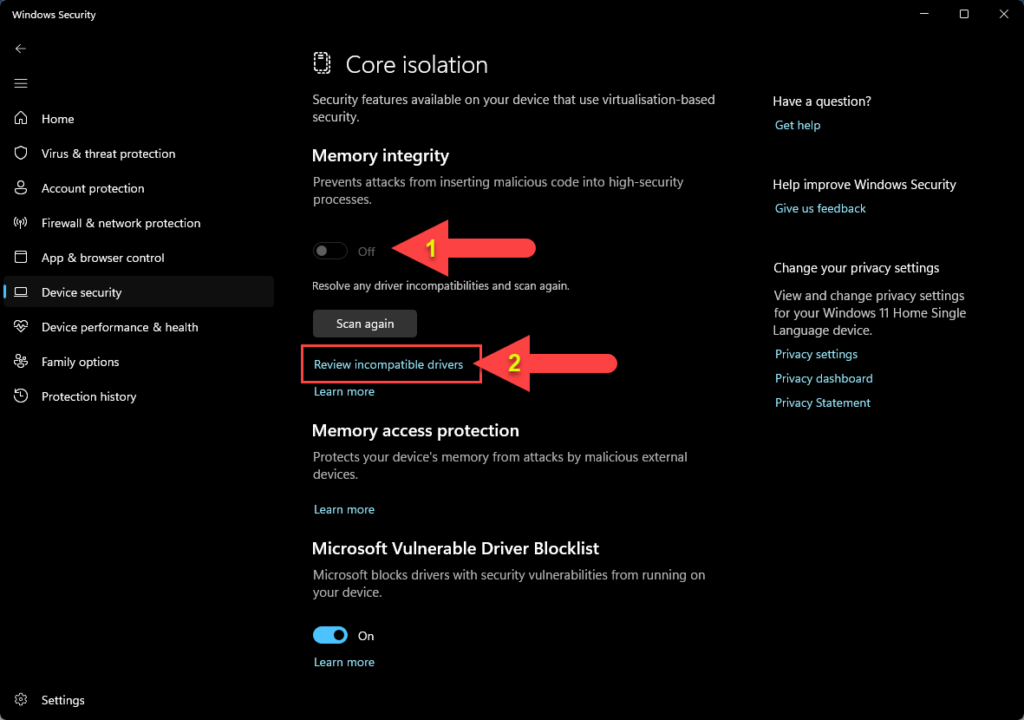
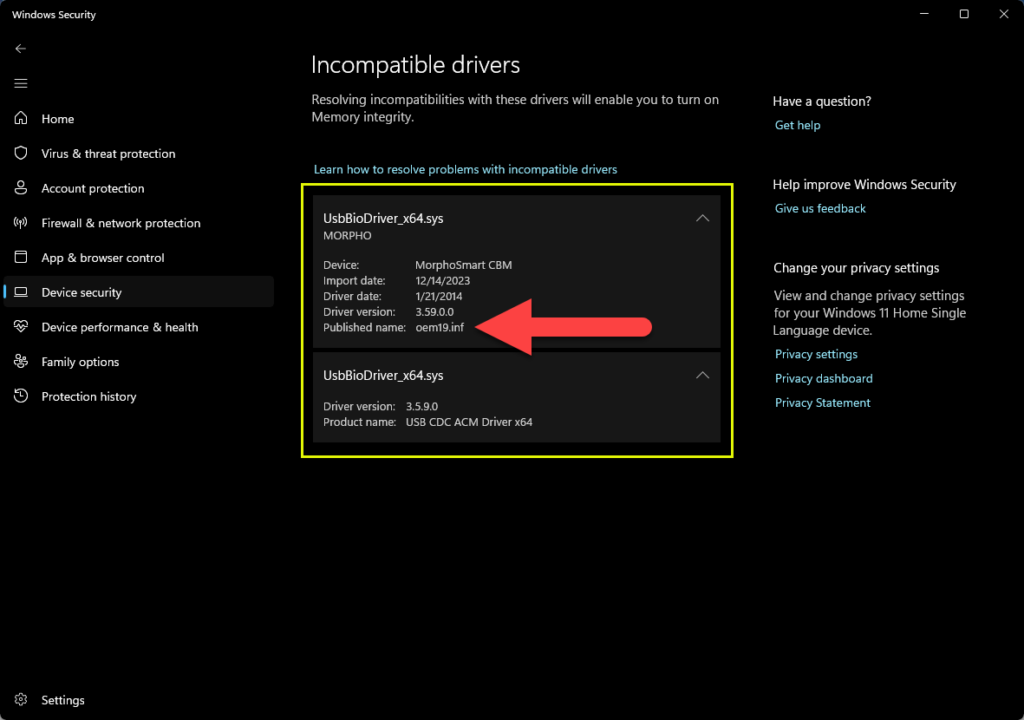
Once open, try to keep On and it can’t be turn on right now due to incompatible drivers and it will show you the Review incompatible drivers option, click on that option as shown in the image below.
Now you can see the list of incompatible drivers in the below image, Morpho Smart CBM in our case, is the incompatible driver due to any reason like outdated drivers or the version of Windows and it’s edition may not supported by the device manufacturer. Here we have to uninstall the below driver through command prompt.
Second : Uninstall incompatible driver through Command Prompt
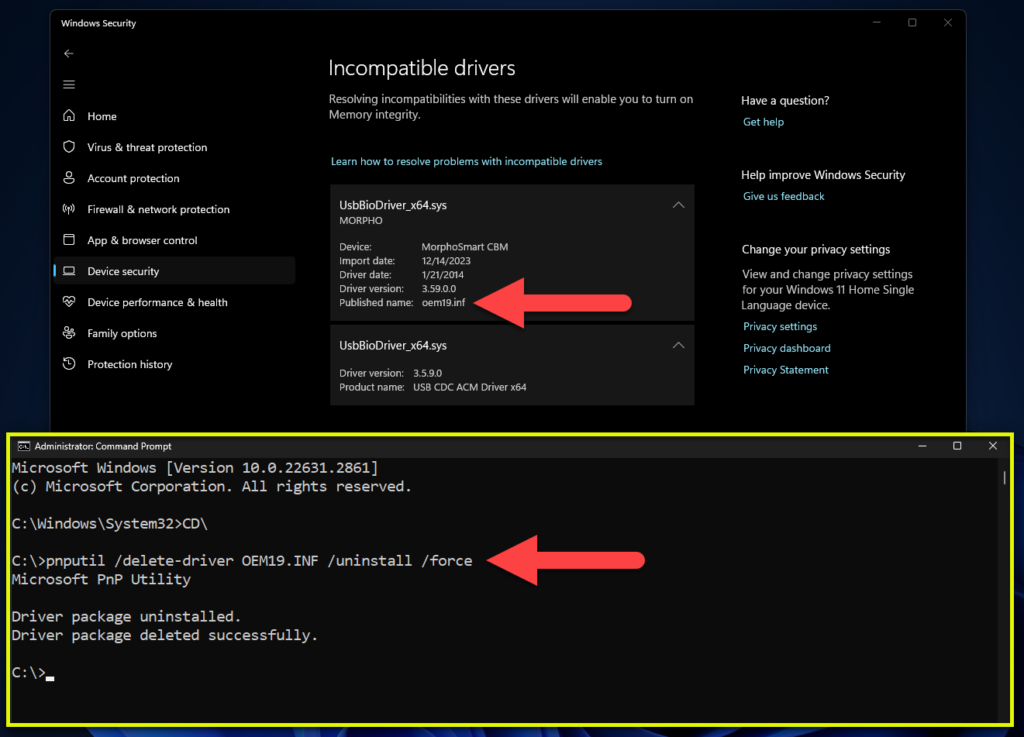
Search CMD and click on Run as administrator to open elevated Command Prompt

Copy & paste the below command to your command prompt window in PC and change the Driver Published Name accordingly and press Enter key. ( In our case oem19.inf is the published name )
pnputil /delete-driver <driver published name> /uninstall /force
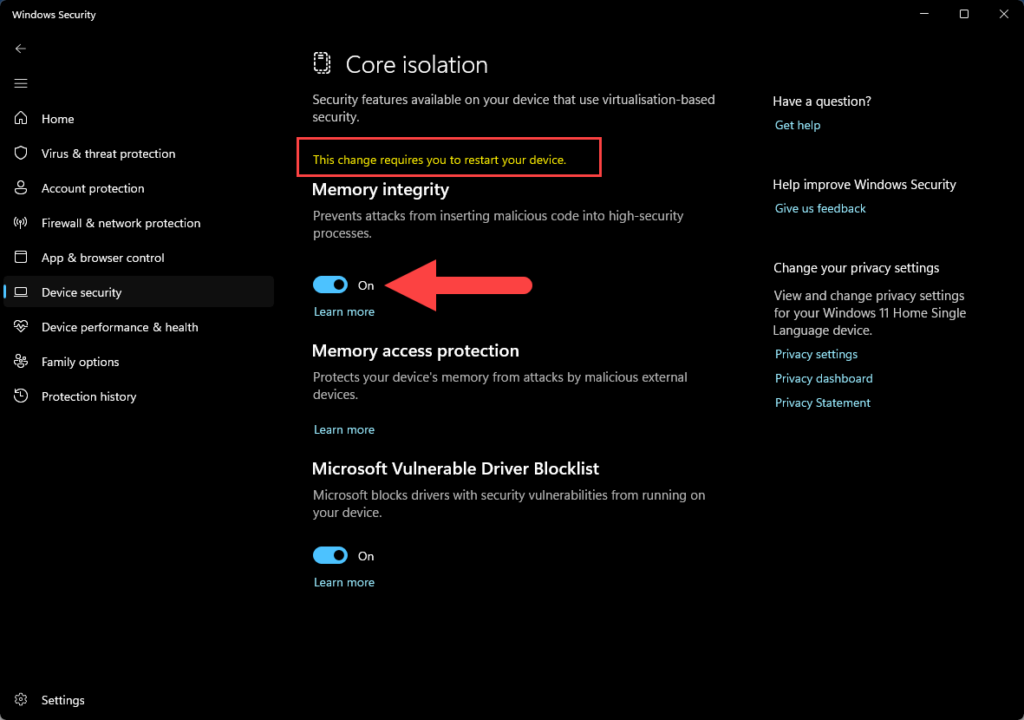
Go back in Windows Security and click on Scan again

Now try to enable this time, you will be able to enable the Memory integrity and restart your system to save the Windows Security settings.
That’s it
Hope you enjoy reading our article. Keep learning.
Thanks