Table of Contents
Hello Friends,
Follow the below article step-by-step guide to install Microsoft .NET Framework on Windows 7 PC in 2 parts
I knew, you tried a lot to solve the blow error but at the end of your effort, I’m suggesting you to try the below step to install Microsoft .NET Framework installation. Whatever the version of Microsoft .NET Framework you want to install on whatever the version and architecture of Windows 7 operating system. Trust me guys! At the end of following this blog step-by-step, I want to put the smile on your face like a charm!

In return don’t forget to comment on this post and Like, Share and Subscribe our Computics Lab YouTube channel.
As you can see in the above first image saying: To run this application you must install one of the following version of the .NET Framework. It is just because of required Microsoft .NET Framework version is not installed yet in the Windows 7 machine. So you have to install it at any cost to run the application successfully.
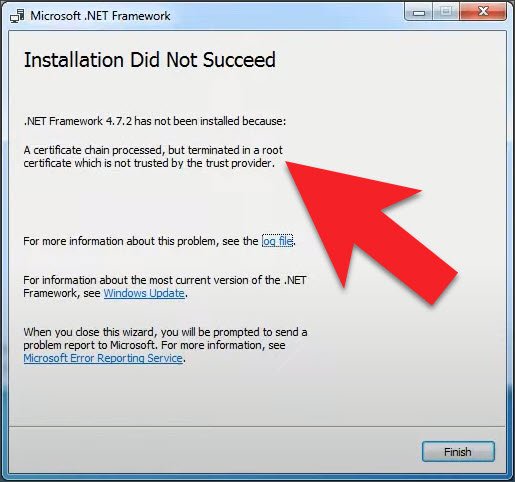
And in the second image while trying to install required Microsoft .NET version is telling: Installation did not succeed .NET Framework has not been installed because: A certificate chain processed, but terminated in a root certificate which is not trusted by the trust provider. It is just because of; now a days you may be aware that Microsoft is not supporting Windows 7 machine as this operating system has End-Of-Life (EOL). Which means Microsoft is not releasing any update after 14 January 2020 for Windows 7 PC. Hence such things happen due to out-of-date operating system configuration. Now here you have to take some manual step in downloading and importing the Microsoft Root Certificate Authority 2011 certificate to successfully install the Microsoft .NET Framework on Windows 7 machine.
PART -1: Things To Consider While Installing Microsoft .NET Framework 4.5.2 Version Or Lower
So guys, here is the tweak start! If you want to install Microsoft .NET Framework 4.5.2 version or lower which already included in higher version of any .NET Framework, then I’m recommending you to always download the offline installer of your Microsoft .NET Framework and try to install it on your Windows 7 machine. I guaranteed you 99.99% this time you will get success in installation of Microsoft .NET Framework. I’m giving you the download link of all the offline installer of Microsoft .NET Framework version here. And in these below version of Microsoft .NET Framework installation you don’t need to install and import any kind of Microsoft Root Certificate Authority. Just download and install it always through offline installer as the image shown below.

Recommendation: I’m recommending you to download and install always the higher version of Microsoft .NET Framework like version 4.8 on your Windows 7 machine. So that you will never be failed to launch any .NET Framework based application in future.
PART -2: Things To Consider While Installing Microsoft .NET Framework 4.6 Version Or Higher
Now let’s begin slightly deeper in configuring your Windows 7 machine with Microsoft Root Certificate Authority 2011 manually. So that you can install Microsoft .NET Framework 4.6 or higher up to Microsoft .NET Framework 4.8 version. When you successfully configured your Windows 7 machine with Microsoft Root Certificate Authority 2011 manually with the below step then you will never get the message like: Installation did not succeed .NET Framework has not been installed because: A certificate chain processed, but terminated in a root certificate which is not trusted by the trust provider.
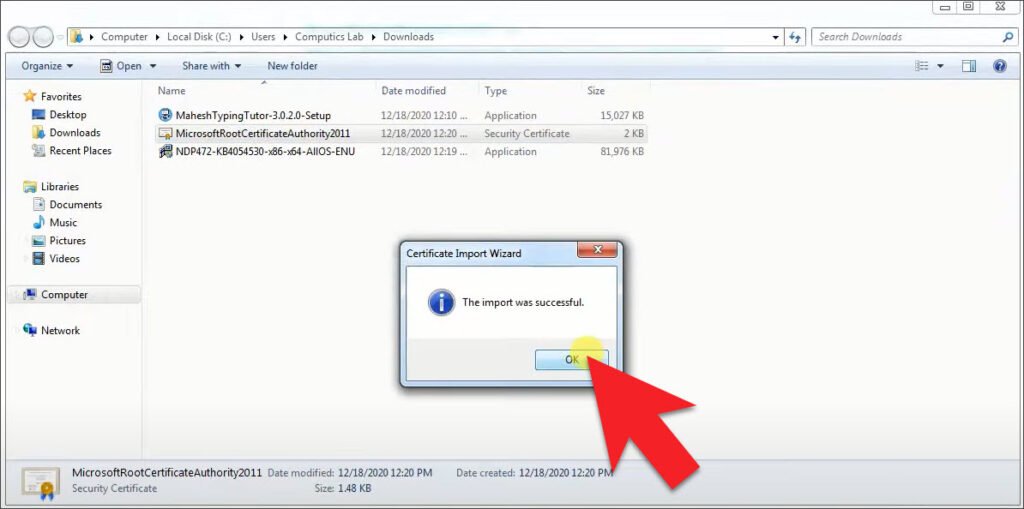
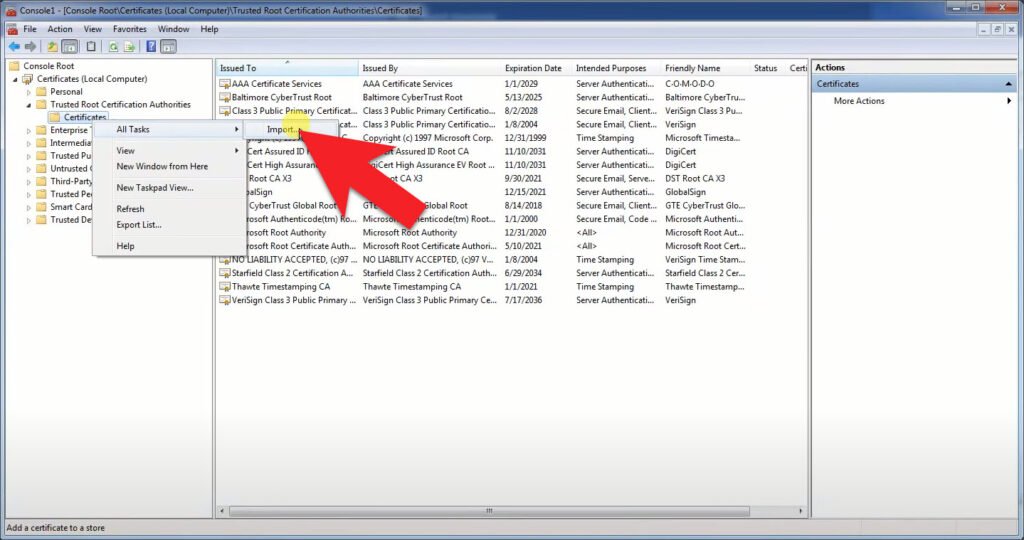
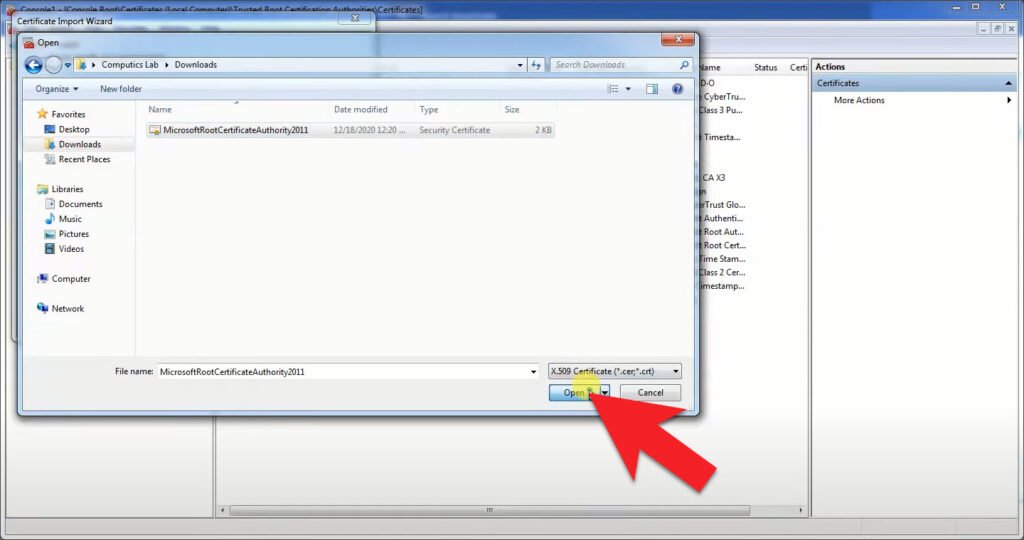
Step -1: Click on the Download Microsoft Root Certificate Authority 2011 button and Install this certificate for User. Follow the step-by-step on your Windows 7 machine as shown in the image below.


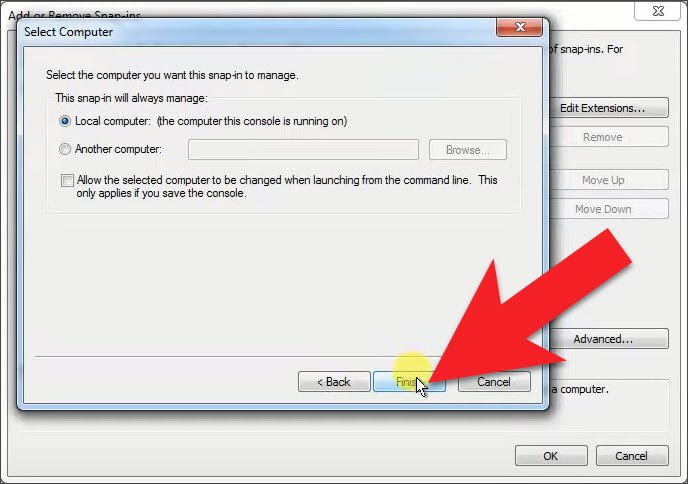
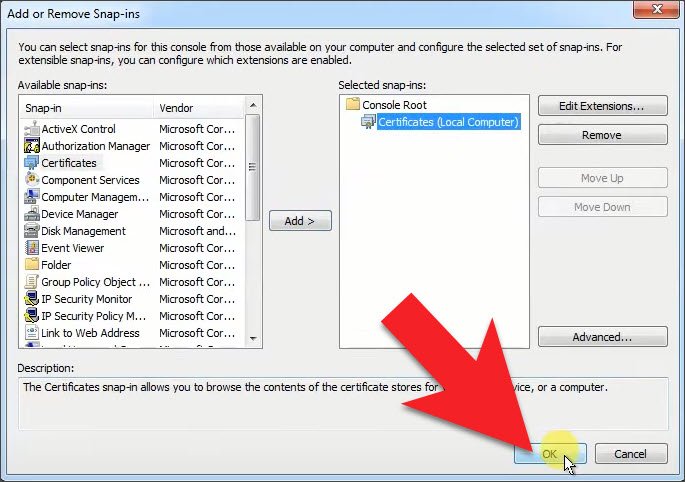
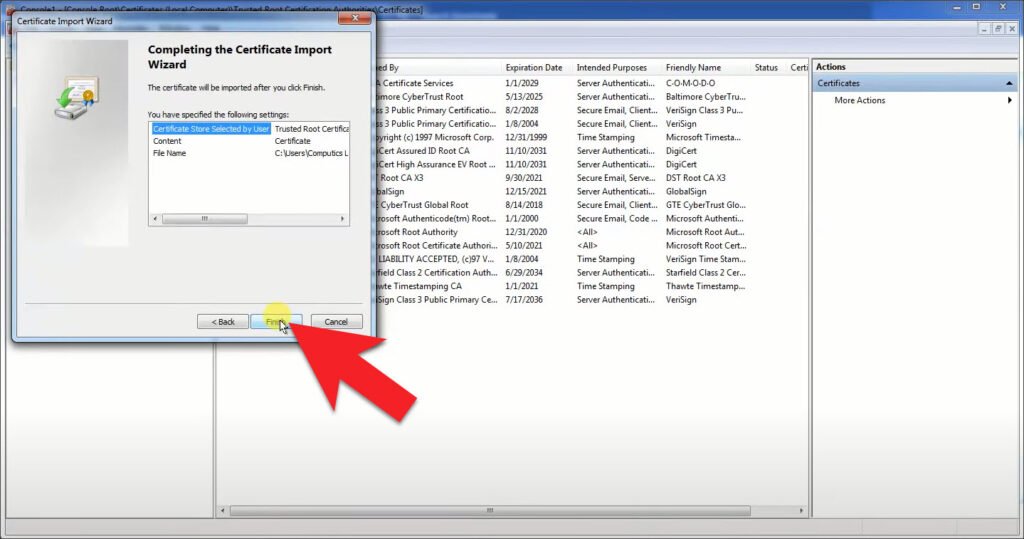
Step -2: Now the same Microsoft Certificate Authority 2011 must be install for Windows 7 Computer. Follow the step-by-step wizard to complete it.


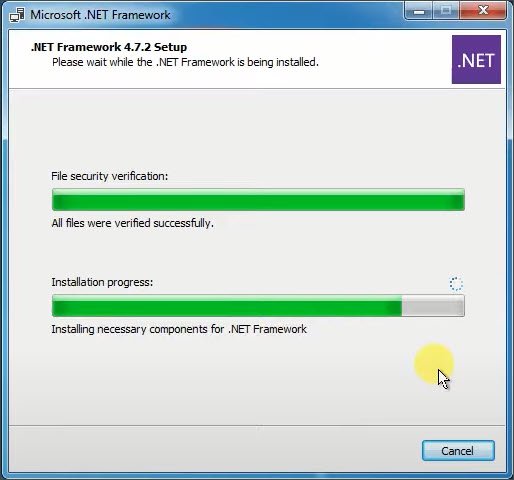
Step -3: Now Download the Microsoft .NET Framework Offline Installer version whatever you want as shown in the image below and follow the step-by-step wizard to complete the installation of your .NET Framework.
Download Microsoft .NET Framework Offline Installer


Here is the video for you guys on our Computics Lab YouTube channel that you can refer and solve it at your own pace. Must like, share and subscribe our Computics Lab YouTube channel which motivate us to create more awesome helping tech videos for you. Thanks for reading and if you have any feedback, don’t forget to comment us on our YouTube video or to this blog post. We will happy to help you!!!
Thanks for reading!!!
Sumit Kumar
Author of this blog!!!
Bhai since a week i was struggling to find the solution, great of you.
Thank you man.
Thanks
I have followed above steps but error 0x80096005 is coming. This article needs to be updated.
“A connection was successfully established with the server, but then an error occurred during the login process. (provider: SSL Provider, error: 0 – The certificate chain was issued by an authority that is not trusted.) ” This error occur when I do Update-Database after migration database