
Hello Friends,
In this article I am going to let you know about the installation of Windows on Mac with M1 and M2 based chip or higher in future release. As our title says the best way to run Windows on Mac with M series chip or even with Intel based MacBook. Because older Mac before 2019-20 Apple’s MacBook came with Intel chip where Windows can be install easily via Bootcamp. And via Bootcamp which is already built-in macOS you can run dual boot of Windows with macOS. And yes Windows 11 2022 22H2 having lots of criteria which need to be fulfill first to install it successfully.
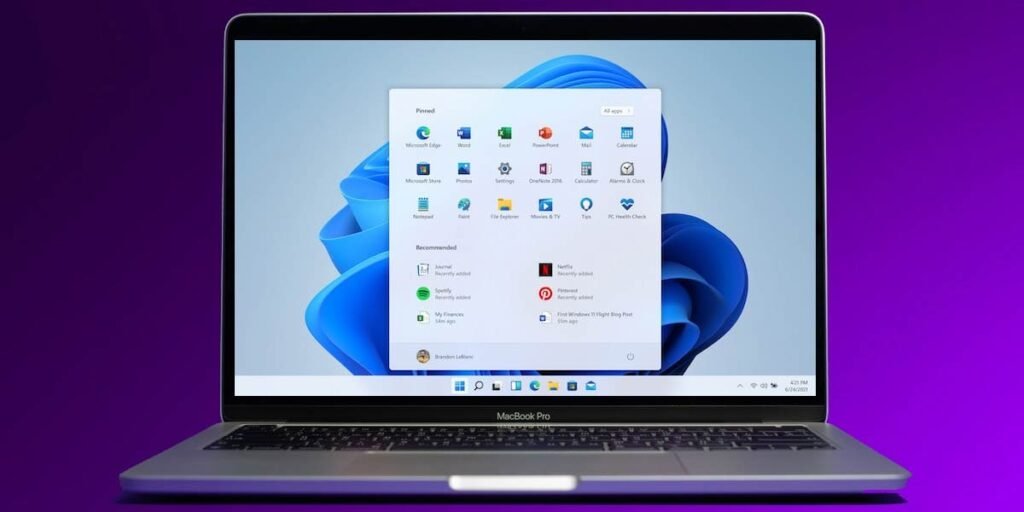
Table of Contents
What happen when install Windows 11 on new MacBook
If you bought your MacBook around or after November 2020 came with M series based Mac then you will be in trouble to install Windows in dual boot. Because M series Apple’s MAC is not supporting Windows on their PC directly. Hence some of the tweak allow you to run Windows on Mac easily. Because we know some of the application supporting the Windows rather than macOS and lots of users are also interested to run Windows on MacBook PC.
My experience about Windows on M series MacBook
I have tired lots of things to run Windows on M1 and M2 based Mac. But at the end, got in trouble related to its installation issue, hardware device driver issue, hanging issue and much more. So here I am suggesting you to run Windows 10 or Windows 11 on Mac in much easier way which will gives you the better experience. So the main question is How to install Windows on MacBook which comes with M1 and M2 chip? It’s simple! Please go with the below step and learn.
How to run Windows on MacBook with M series chip
The clue is to run Windows on new Apple’s MAC PC to install and run Parallels Desktop which allow you to virtualize the Windows 10 or Windows 11 and fulfill the system criteria for you. Like we know system requirement for Windows 11 must be fulfill first to install it. So Parallels Desktop do it for you in a virtualize form like TPM 2.0, BIOS in UEFI with GPT supported disk and Processor requirement etc.
I have realized best experience ever using Parallels Desktop to run Windows on MacBook like below;
| Features | Support in Parallels |
| Optimize for new macOS | Yes |
| Run Windows and macOS without restarting it | Yes |
| Built-in download Windows and installation feature | Yes |
| Copy and Paste between Windows and macOS | Yes |
| Run Windows Games smoothly | Yes |
| Virtualize CPU, RAM and Disk | Yes |
| Virtual Networking between Windows and macOS | Yes |
| Centralize Administration management | Yes |
| Transfer data between Windows and macOS | Yes |
| One click tuning for Games, Software development, Productivity etc. | Yes |
| External USB device like Pen Drive, Hard Drive supported in both OS | Yes |
Step-by-step installation to run Windows on macOS
To run Windows on macOS follow our instruction below carefully so that you will be successfully install Windows 11 or Windows 10 or any other OS. Go with Parallels when you have M series MacBook otherwise you can prefer to install Windows through Bootcamp.
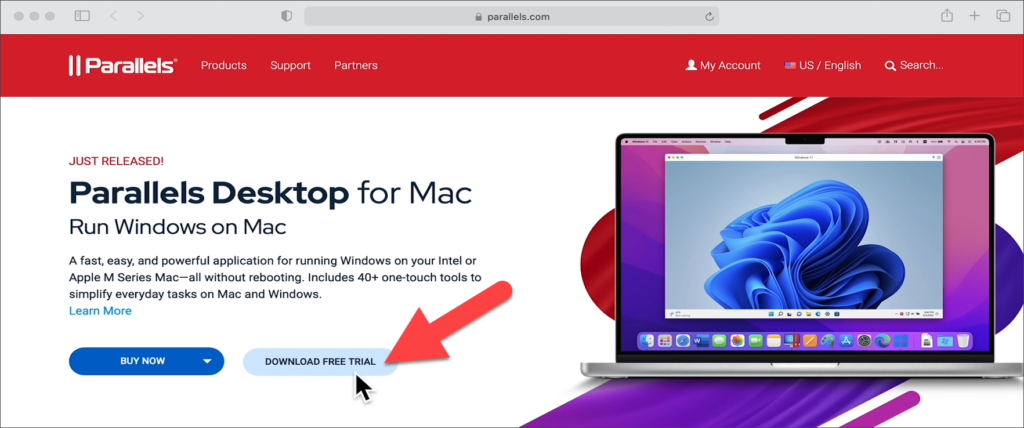
Visit Parallels and download the 14 days Free Trial version of Parallels Desktop application for Mac
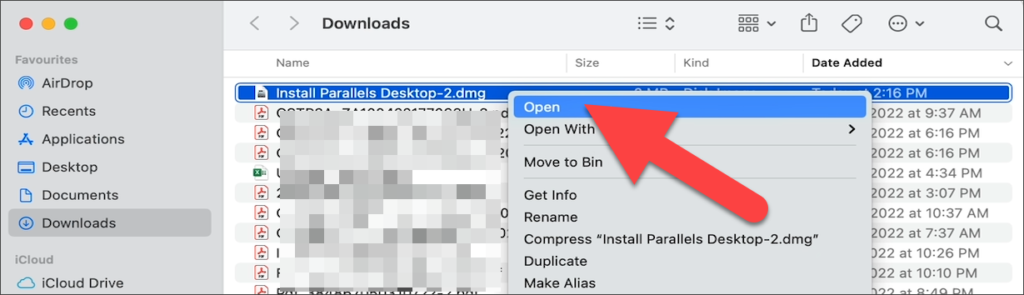
Go to Downloads and Open to Install Parallels Desktop.dmg file
Click on Parallels Desktop Icon to install it

Accept the License Agreement

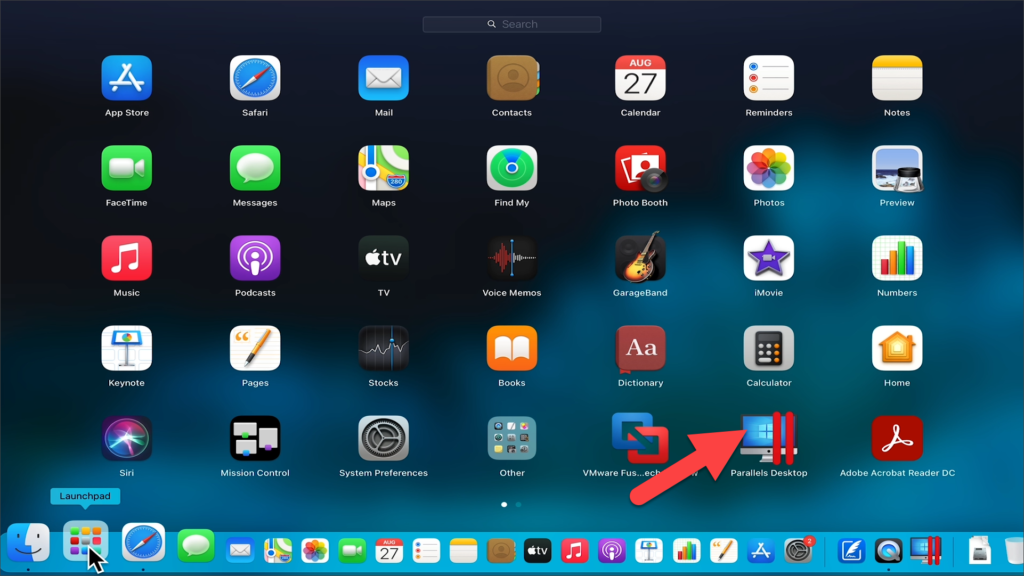
Go to Launchpad and open Parallel Desktop
Click on the Plus icon to create a New virtual machine for you as I have already created one

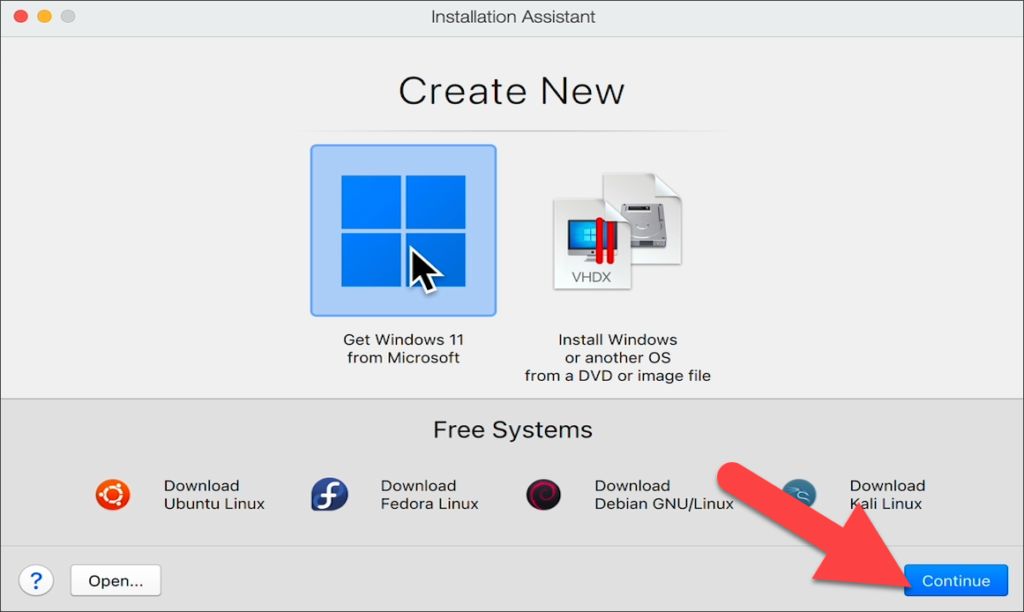
Click Continue as our MacBook is based on Apple M series chip

Choose your desired OS. You can also select the latest ISO if you have already in case of like Windows 11 2022 update version 22H2 as I’m selecting to install Windows 11 on macOS and click Continue
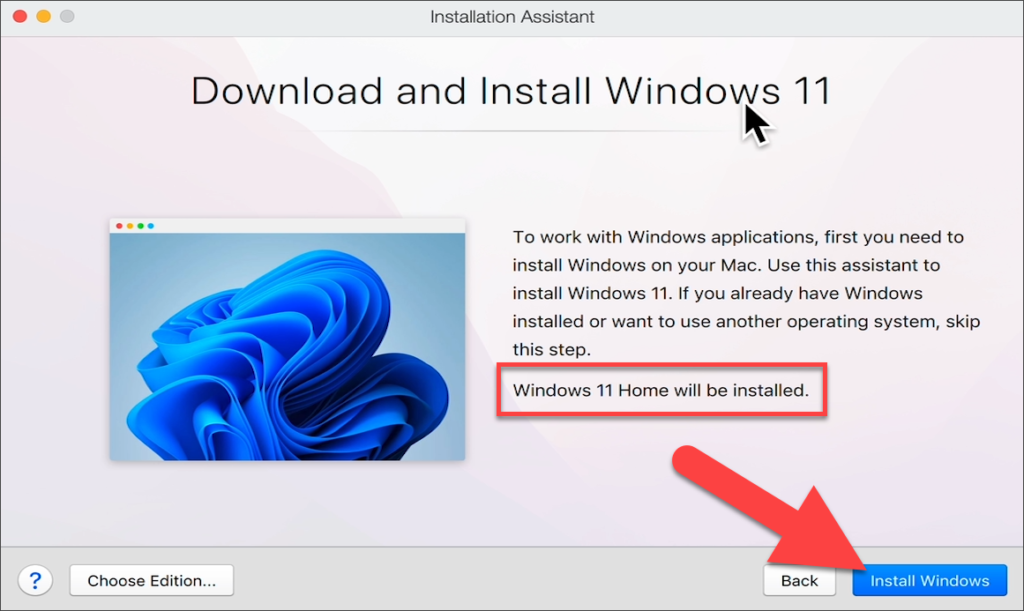
Click on Install Windows to download and install the Windows for you on macOS
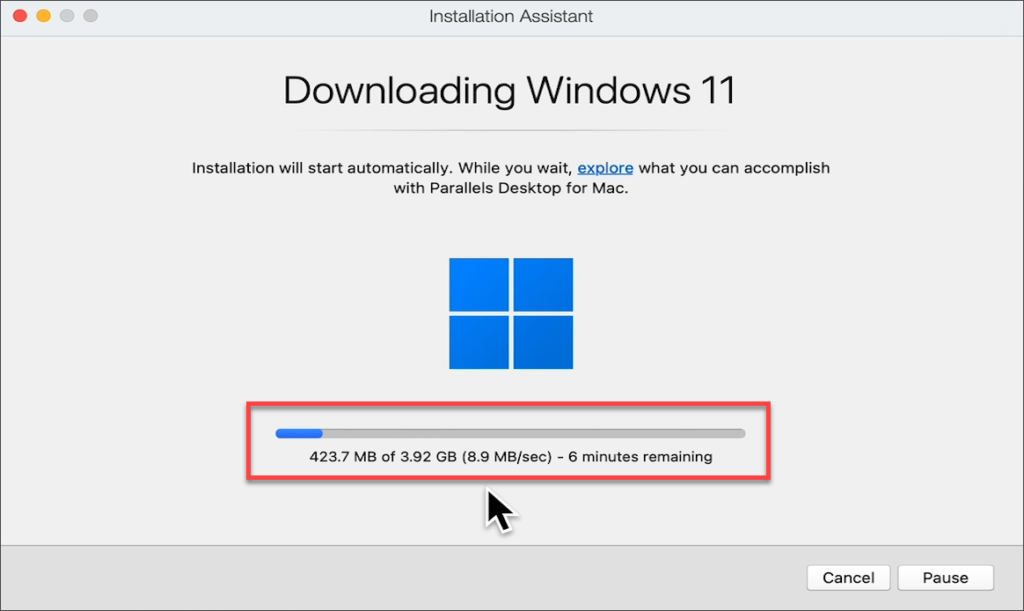
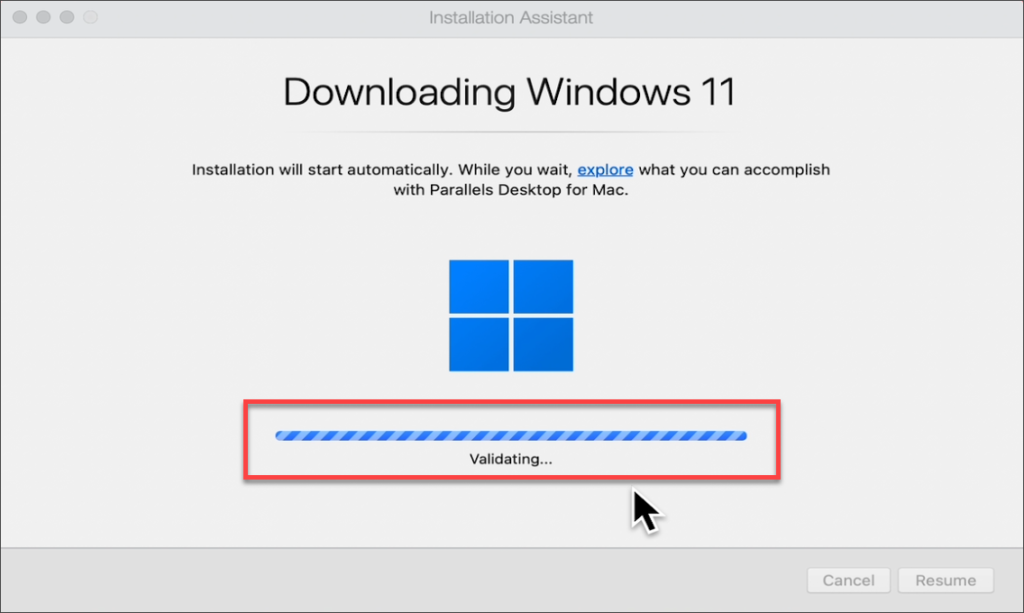
You have to wait for few minutes to download the image of Windows 11 here. And definitely it’s depend upon your Internet speed as well.
Validating the image after downloading
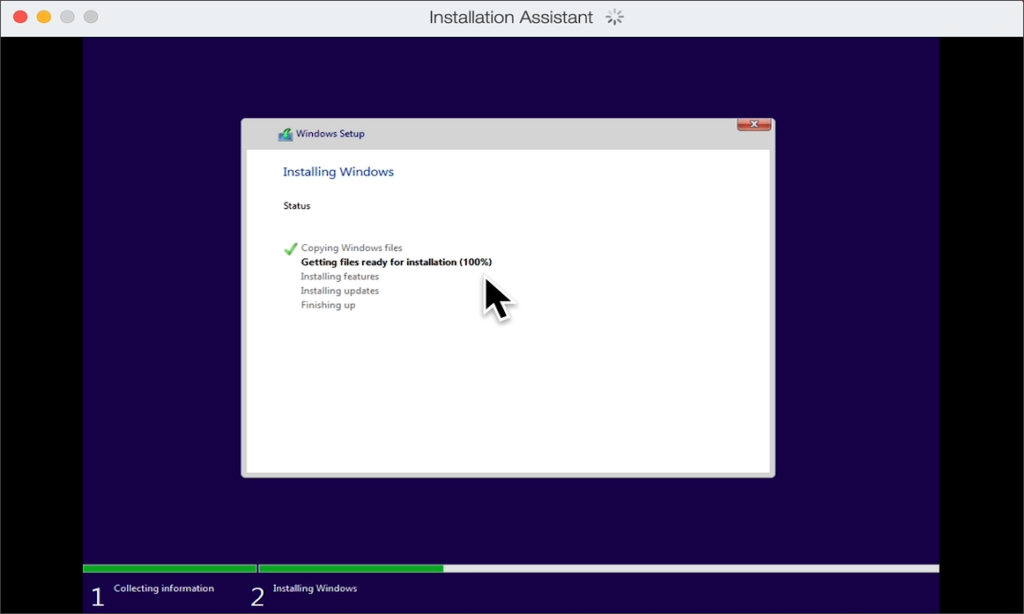
As you can see in the image Windows 11 is installing on macOS
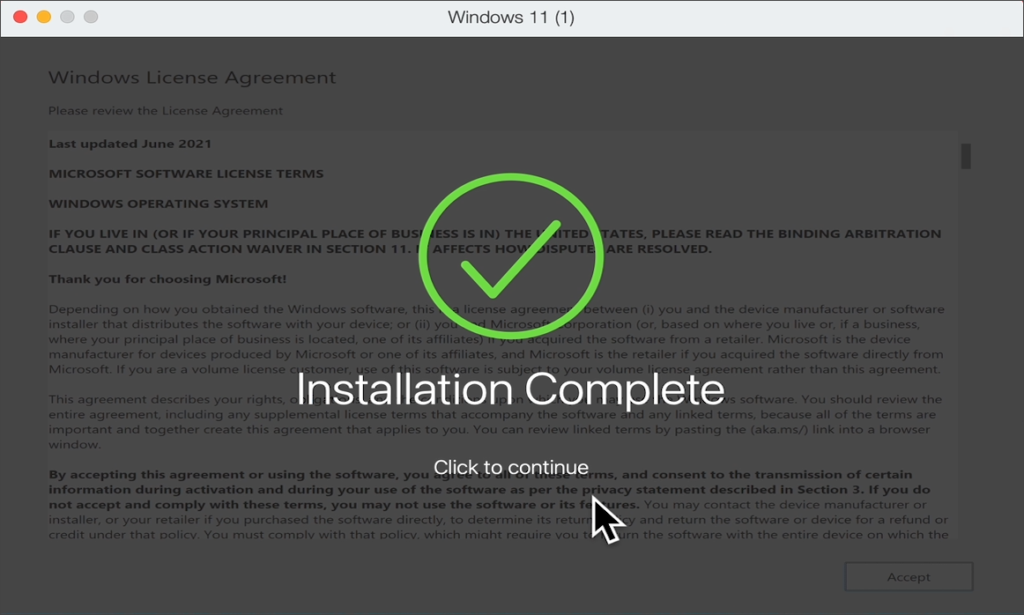
After 100% installation of Windows 11 successfully you will get the Installation Complete window. Click to continue using it.
Windows 11 Desktop appeared on macOS after successfully installation

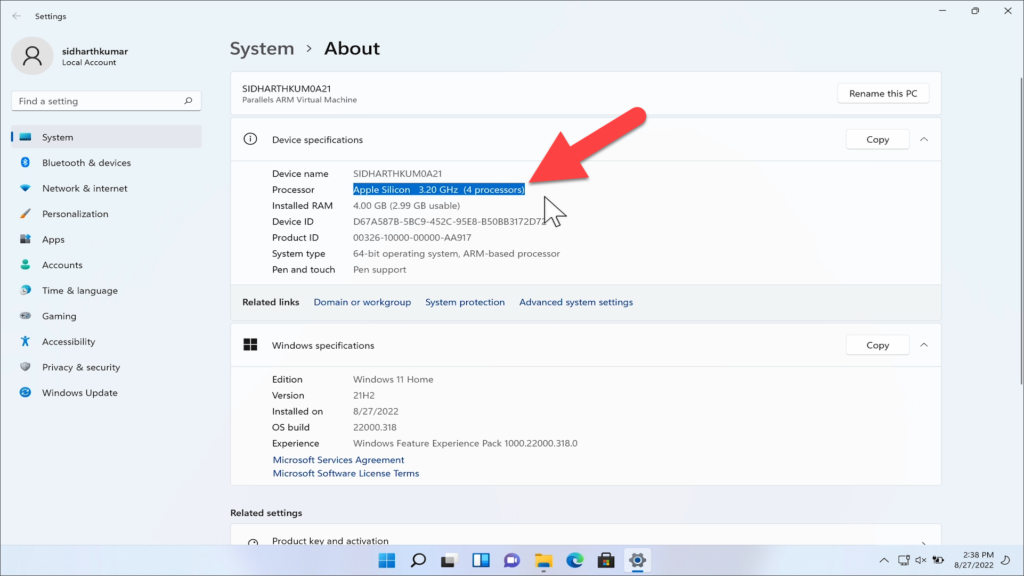
When you go to System Properties you can see the Windows 11 running on Processor Apple Silicon
After installation of Windows 11 on MacBook you can customize its Settings in General as per your needs. So that your Windows 11 on macOS can run more better than the best. Right now my Windows 11 configure for Productivity. Change it if you need it as per your requirements.
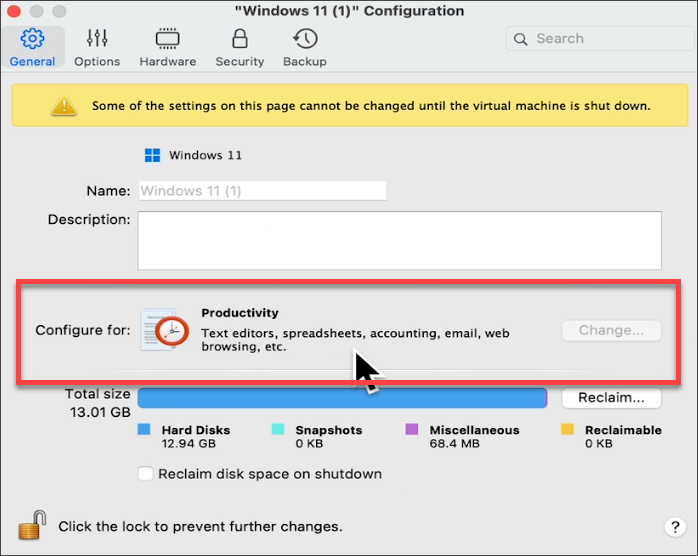
You can also go through with other Settings like in General, Options, Hardware, Security and Backup for more optimize settings for your Windows 11.
Hope you will feel greater experience using Windows 11 on macOS via Parallels Desktop.
Thanks for reading it!!!