Know the process of Morpho L1 RD Service installation in Windows PC. As per the latest biometric authentication guidelines in India, users are now required to switch from Morpho L0 devices to Morpho MSO 1300 E3 RD L1 devices. The older L0 devices are being phased out, and many government applications now require L1-certified biometric devices for secure authentication.
However, many users are facing installation issues when trying to set up their Morpho L1 devices on Windows PCs. This guide will walk you through the proper installation process and system requirements to ensure smooth functionality across various Indian governance applications.
✅ Morpho L1 Minimum System Requirements
Before installing the Morpho L1 device, make sure your system meets the minimum hardware and software requirements:
🔧 Software Requirements
To use the Morpho MSO 1300 E3 RD L1 biometric device on your computer, ensure the following:
- Operating System:
- Windows 10 (32-bit or 64-bit)
- Windows 11 (All editions)
- Supported Web Browsers:
- Google Chrome (Version 60 or above)
- Mozilla Firefox (Version 56.0 or above)
- Microsoft Edge (Latest version recommended)
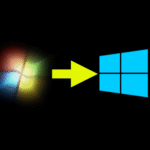
Still using Windows 7? It’s time to upgrade to Windows 10 atleast because Mantra L1 is not supporting Windows 7 anymore. Follow our easy step-by-step guide to upgrade your Windows 7 PC to Windows 10 safely and smoothly, even if you’re not tech-savvy.
💻 Hardware Requirements
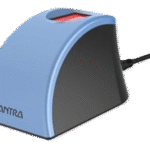
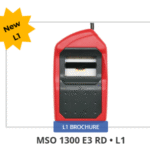
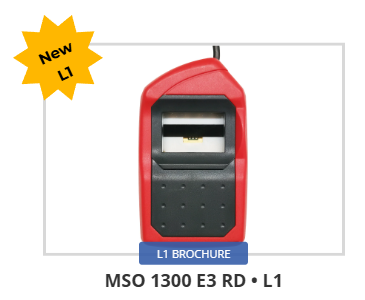
- Device: MSO 1300 E3 RD Sensor (L1 Certified)
- Processor: Minimum Intel i3 or equivalent
- RAM: Minimum 4 GB
- USB Port: At least one available USB 2.0/3.0 port
- Internet Connection: Required for RD service registration and authentication
🔄 Why Upgrade to Morpho L1?
- Mandatory for UIDAI Aadhaar authentication and e-Governance applications
- L1 devices offer enhanced security and certified encryption
- Required for services like CSC, Jeevan Pramaan, Aadhaar Seeding, and more
🔧 Prepare Your PC Before Installing Morpho L1 Device – Step-by-Step Guide
Before installing and configuring the Morpho MSO 1300 E3 RD L1 device, it is crucial to prepare your PC properly. Many users skip this step and directly try to install the Morpho driver, which often leads to issues during device usage.
Follow these essential steps to ensure a smooth installation and avoid common errors:
✅ Step 1: Download and Install All VC++ Redistributables (2005 to 2022)
Installing Visual C++ Redistributable packages is a necessary step. Many driver-based applications like Morpho RD Service rely on these VC++ library files to function correctly.
👉 Why it’s important:
Without these redistributables, the RD service may not work as expected or may fail to launch.
✅ What to do:
Download and install all Microsoft VC++ Redistributables from versions 2005 to 2022.
You can find all-in-one VC++ installers online that install all versions with just one click.
🗑️ Step 2: Uninstall Morpho L0 Driver (If No Longer in Use)
If you’re no longer using Morpho L0 and have moved to the newer Morpho L1 device, it’s better to remove the old driver to avoid conflicts.
👉 Important Note:
Morpho L0 might still be required for CSP banking services. If you’re not a CSP user, you can safely uninstall it.
✅ What to do:
- Uninstall the Morpho L0 driver from your system.
- Go to C:\ Drive and manually delete any folders related to Morpho that still exist.
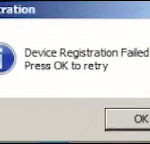
♻️ Step 3: Uninstall IdemiaL1RdService (If Previously Installed)
If you’ve previously installed IdemiaL1RdService, you must uninstall it before proceeding with a fresh installation. Reinstallation ensures all system components are set up properly.
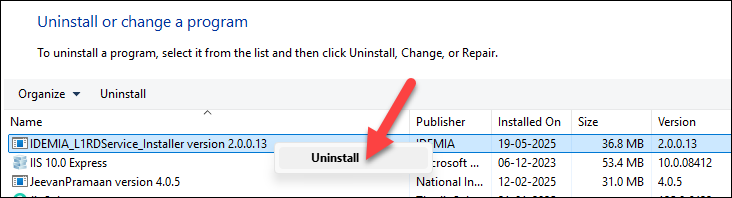
✅ What to do:
- Uninstall IdemiaL1RdService from your PC by running appwiz.cpl command from Run menu.
- After uninstall delete the IdemiaL1RdService folder from the C:\ Drive (if it is still exists).
- If you receive an error while trying to delete the folder, run the below command to stop any active process:
taskkill /F /IM msedge.exe /T
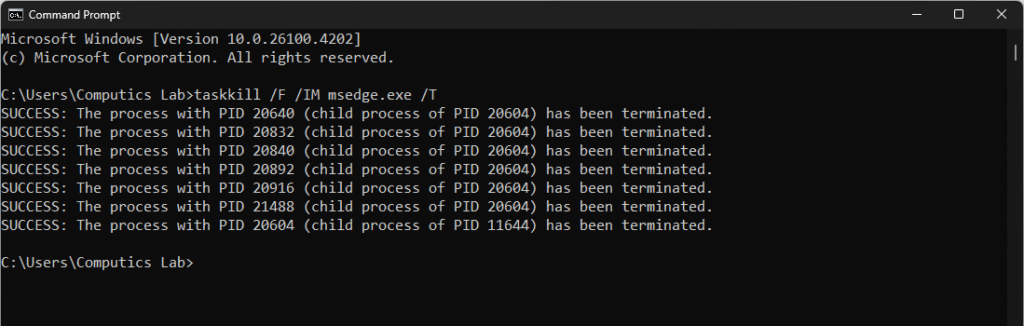
This will terminate any running Edge browser processes that may be locking the folder and then delete the folder IdemiaL1RdService from the C:\ Drive
📌 Final Tip
By properly preparing your system with these three critical steps, you significantly reduce the chances of errors during Morpho L1 setup and ensure compatibility with Aadhaar and other biometric authentication services.
🧩 Morpho L1 RD Service Installation in Windows 10/11 – Complete Guide
Now that you’ve prepared your PC, you are ready to install the Morpho MSO 1300 E3 RD L1 driver on your Windows 10 or Windows 11 system without facing issues during usage. Follow the step-by-step instructions below for a smooth installation of the Morpho L1 RD biometric device.
✅ Step 1: Connect Your Morpho MSO 1300 E3 RD L1 Device
- Plug your Morpho L1 biometric device into a USB port on your PC.
- ⚠️ Important: Do not disconnect the device until the installation process is completely finished.
📥 Step 2: Download the Correct Driver for Morpho L1 RD Service
Downloading the correct Morpho L1 RD service driver is very important, as there are three types of drivers available. Each is designed for specific applications or platforms.
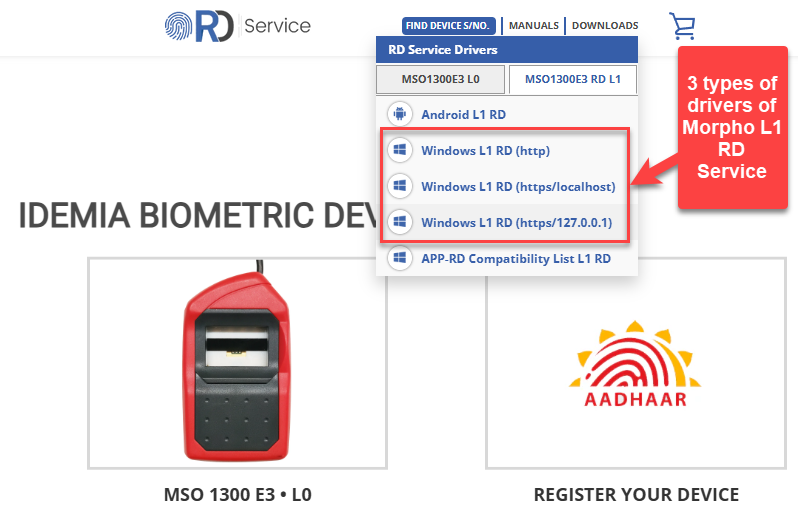
✅ What you must do:
- Refer to the official APP-RD Compatibility List (L1 RD Checklist)
- Download the proper RD Service driver that matches the application you’re planning to use (e.g., Aadhaar, CSC, Banking services, Jeevan Pramaan Life Certificate, DIGI Pay, PayNearby, Ayushman Bharat, PM Sammanidhi, SBI Kiosk banking or CSP etc.)
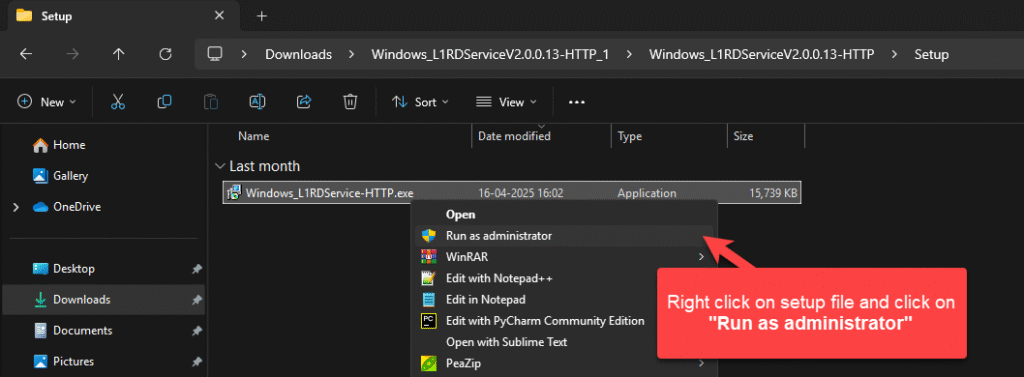
💾 Step 3: Install the Morpho L1 RD Service Driver
Once you’ve selected and downloaded the appropriate driver:
- Extract the downloaded ZIP file (if needed)
- Run the installer and follow the on-screen instructions
- The installation process is simple—just like installing any regular software on Windows
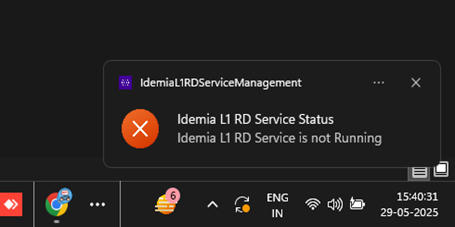
📢 After installation, you will see a message in the bottom-right corner:
- “Idemia L1 RD Service is not Running”
- After a few seconds, it should change to “Idemia L1 RD Service is Running”
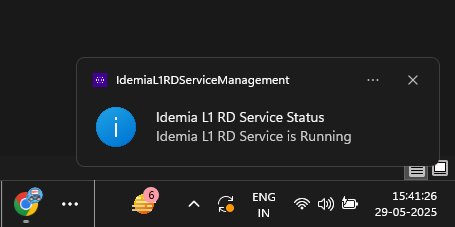
🔍 You can also manually verify this by:
Pressing Windows + R, typing services.msc, and checking the status of the Idemia L1 RD Service

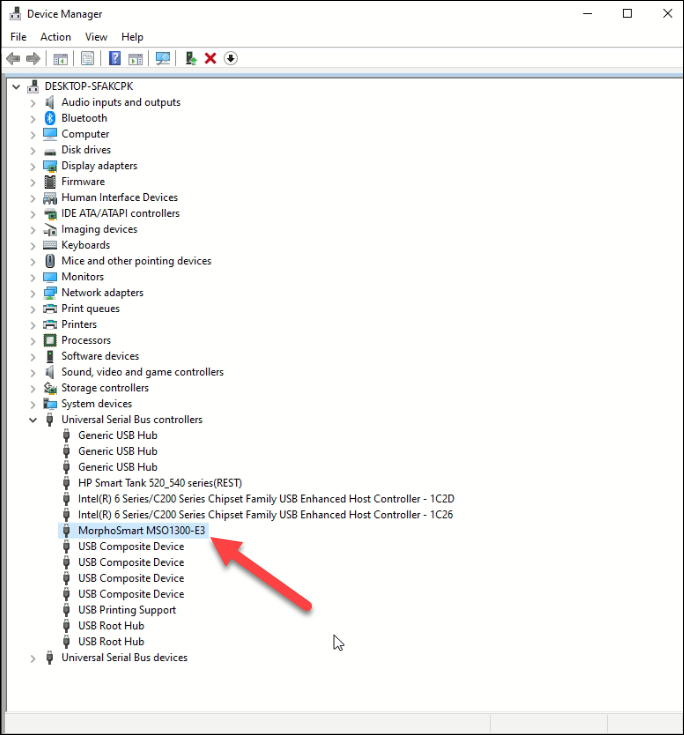
🖥️ Step 4: Check Morpho MSO 1300 E3 RD L1 Device Status
- Open Device Manager by pressing Windows + R, typing
devmgmt.msc, and hitting Enter - Scroll to Universal Serial Bus controllers
- Ensure you see MorphoSmart MSO1300-E3 listed without any yellow warning or disabled icon
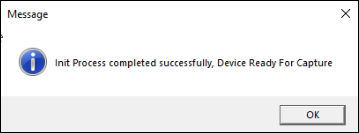
✅ If everything is working correctly:
- You will see a pop-up message: “Please wait”
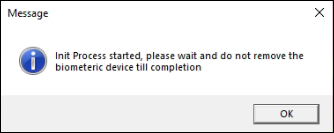
- After 20–30 seconds, it will change to: “Device Ready For Capture”
🎉 CONGRATULATIONS!!! Your Morpho L1 RD biometric device is now ready to use with your selected application or authentication platform!
💡 Tip: How to Change Communication Mode in Idemia RD Service Utility
Now you can easily switch between different communication modes in the Idemia RD Management Utility as per your application requirements. If you’re unsure which mode to choose, it’s recommended to refer to the communication guidelines provided by your application provider, web developer, or refer the APP-RD Compatibility List (L1 RD Checklist).
To change the communication mode:
- Go to the bottom-right corner of your screen (system tray).
- Locate and open the Idemia RD Management Utility program.
- From there, you can select and change the communication mode as needed.
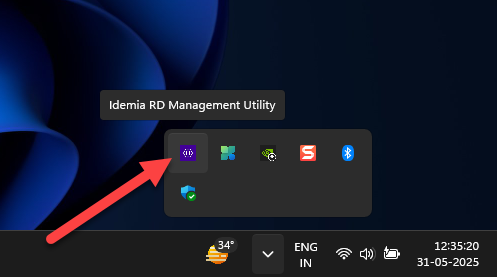
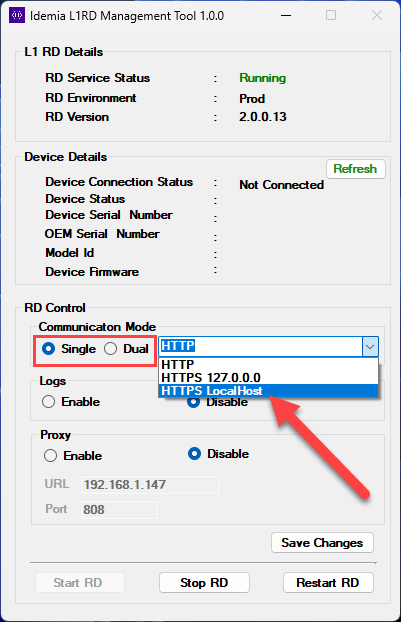
This flexibility ensures compatibility with various biometric authentication systems and software applications using the Idemia RD Service.
📞 Need Help?
If you’re still facing any issue with the Morpho L1 RD Service installation on your Windows PC, call us directly at +91-9015367522.
We are happy to assist you and provide complete support for your Morpho device setup.
Sumit Kumar is an experienced IT professional specialized in Windows System and Network Administration. Miscrosoft & Cisco certified, he has worked with leading global IT firms, including TCS. YouTuber @ Computics Lab, Tech Blogger computicslab.in/blog. Developed tools like Mahesh Typing Tutor, JP Assist, and WMI Rocker under brand Computics Lab. Continues to simplify technology for everyday users.