

Learn How to Upgrade Windows 7 to Windows 10 – Step-by-Step easily at home. Follow this step-by-step guide to install Windows 10 (22H2 version) without losing your data.
Why You Should Upgrade from Windows 7 to Windows 10
If you’re still using Windows 7, it’s time to upgrade to Windows 10 for better security, compatibility, and performance. Most biometric devices like Mantra MFS110 L1 and Morpho L1 now require at least Windows 10 to function properly, especially for online authentication work.
Microsoft ended official support for Windows 7, which means no security updates, making your system vulnerable to threats. Upgrading to Windows 10 ensures you stay secure and compatible with modern hardware and software.
Can You Upgrade to Windows 11?
Although Windows 11 is available, many older PCs don’t meet the minimum hardware requirements. If your system doesn’t support Windows 11, upgrading to Windows 10 (22H2 version) is still a great option.
Before You Begin: Prepare Your PC
This guide covers an upgrade, not a clean installation. All your files will remain as they are, but it’s recommended to take a backup. Here’s what you need:
✅ System Requirements:
- At least 50 GB of free space in C: drive
- Stable internet connection (for downloading Windows 10 ISO file)
- WinRAR, 7-Zip, or any other extraction tool installed
- Backup important data from Desktop, Documents, and Downloads folders to another drive
Steps to Upgrade Windows 7 to Windows 10
Upgrade Windows 7 to Windows 10 – Step-by-Step begins here:
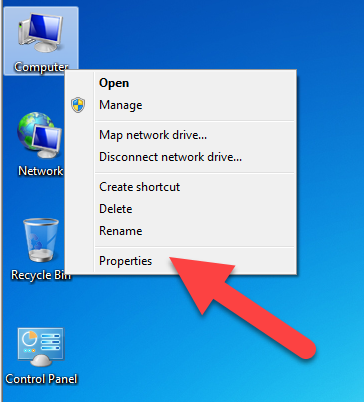
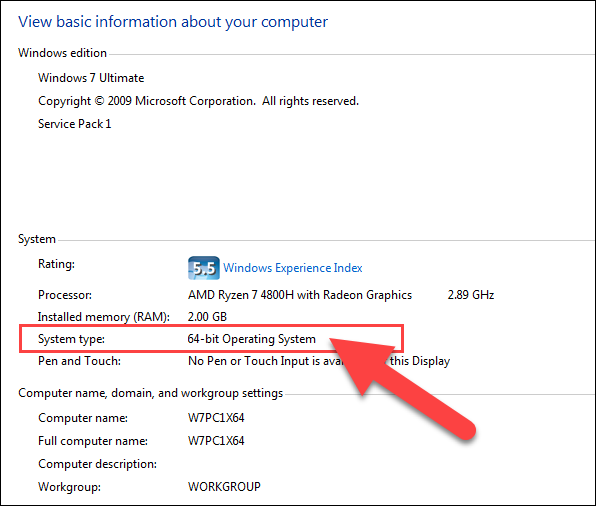
Step 1: Check Your System Architecture
Right-click on ‘My Computer’ > Properties and check if your system is 32-bit or 64-bit under System Type.


Step 2: Download Windows 10 ISO File
Based on your system type download the Windows 10 ISO accordingly:
💡 Tip: Save the ISO file in a drive other than C:
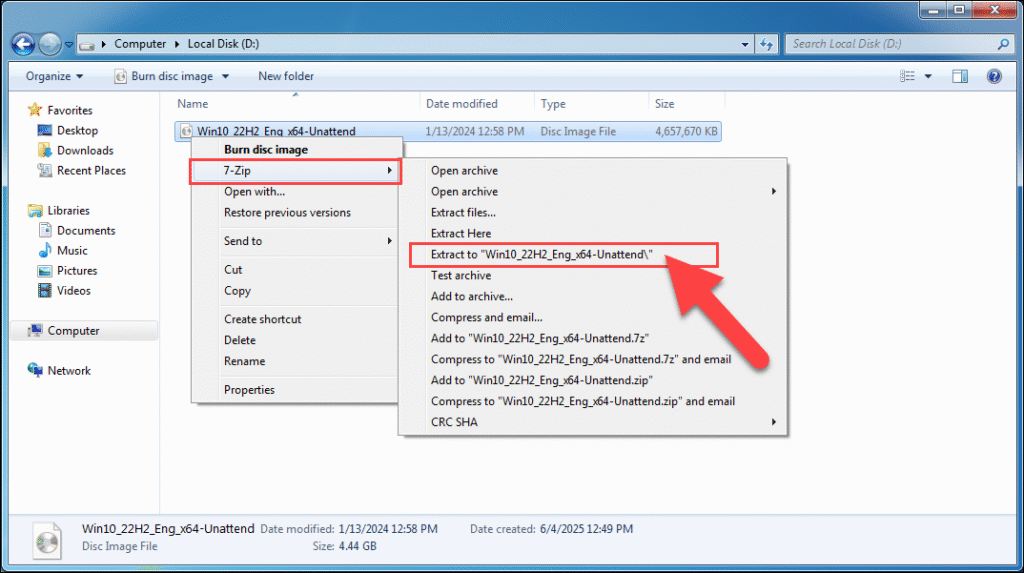
Step 3: Extract the ISO File
Use 7-Zip or WinRAR to extract the ISO file into a folder.
Right-click the ISO → “7-Zip” → Extract to “Win10_22H2_Eng_x64-Unattend\” begin the process.

Step 4: Run the Setup File
Navigate to the extracted folder → open the Sources folder → find and right-click on Setup.exe → select Run as administrator.


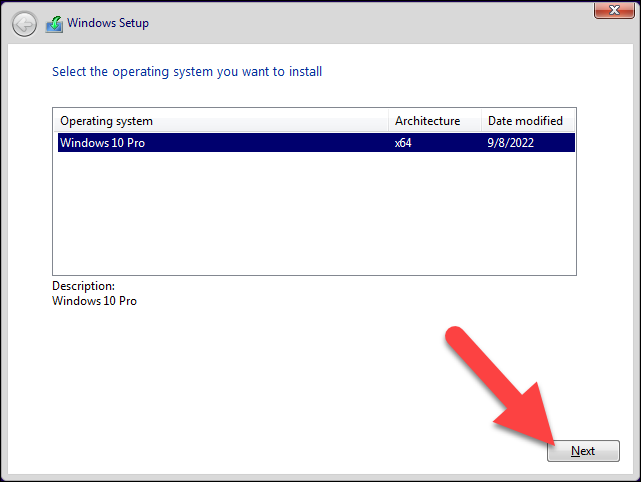
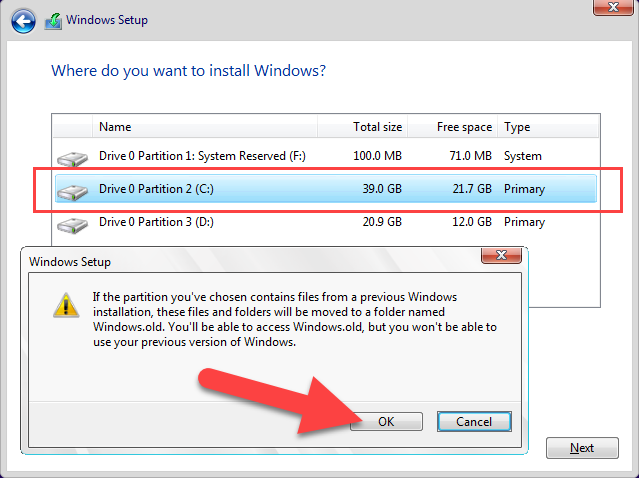
Follow the setup wizard:
- Select the Windows 10 edition (usually Windows 10 Pro)
- Choose C: drive as the installation target
- Accept the warning that a Windows.old folder will be created


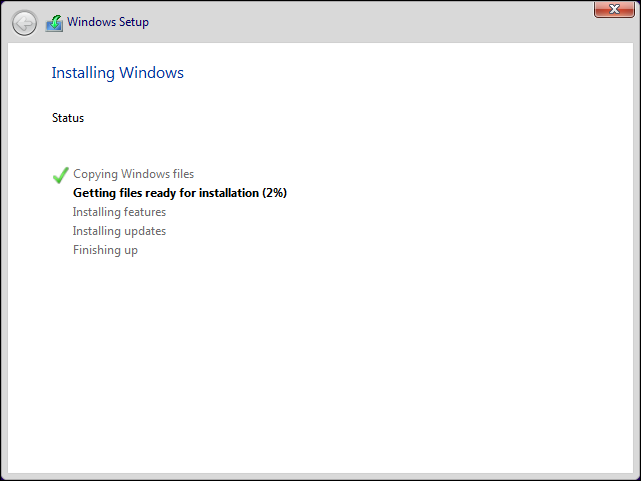
Upgrade Windows 7 to Windows 10 – Step-by-Step is done and you can see the Windows 10 installed successfully.

What Happens Next?
- Your PC will restart multiple times during the upgrade
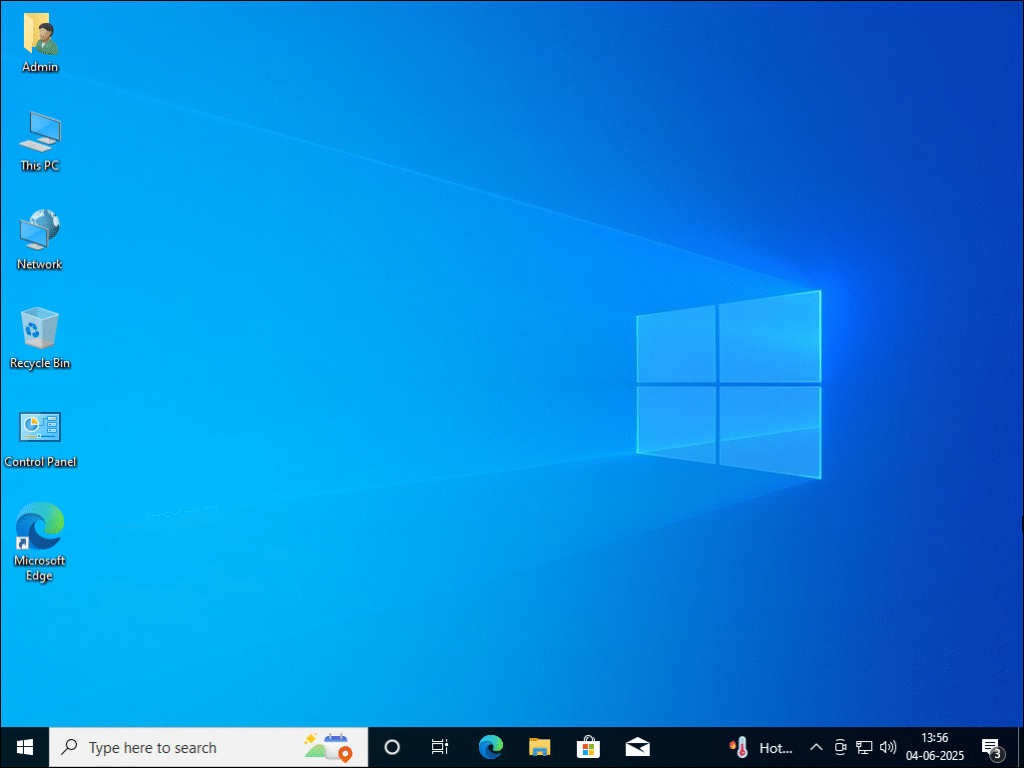
- After completion, you’ll land on the Windows 10 login screen
- No password is required—just press Enter
Congratulations! You’ve successfully upgraded your system to Windows 10 🎉
Final Words: Upgrade Now for a Secure Future
Upgrading from Windows 7 to Windows 10 is not only easy but also essential in 2025. With biometric authentication, modern apps, and better protection, Windows 10 is the right step forward. Install all the common software and device drivers once the Windows 10 is finallized.
💡Tip:
You can use our site Computics Lab to install all the common software with just single batch file. Like Chrome, Firefox, VLC Media Player, WiRAR, 7-Zip, Foxit Reader etc.
📞 Need Help? Contact Us!
If you face any issues while upgrading from Windows 7 to Windows 10, feel free to contact us for any assistance. Like if you still have any issue related with Morpho L1 and Mantra L1 biometric device or any other devices.
📱 Call or WhatsApp: +919015367522
We’re here to help you with Windows installation, biometric device setup, and other computer-related solutions.


Sumit Kumar is an experienced IT professional specialized in Windows System and Network Administration. Miscrosoft & Cisco certified, he has worked with leading global IT firms, including TCS. YouTuber @ Computics Lab, Tech Blogger computicslab.in/blog. Developed tools like Mahesh Typing Tutor, JP Assist, and WMI Rocker under brand Computics Lab. Continues to simplify technology for everyday users.